Dipping A Toe In The Inkwell
Having never used a dip pen, I headed into this experiment assuming it would be expensive, messy, and mildly annoying. But I assume that about a lot of things. So I pressed on, hoping for the best.
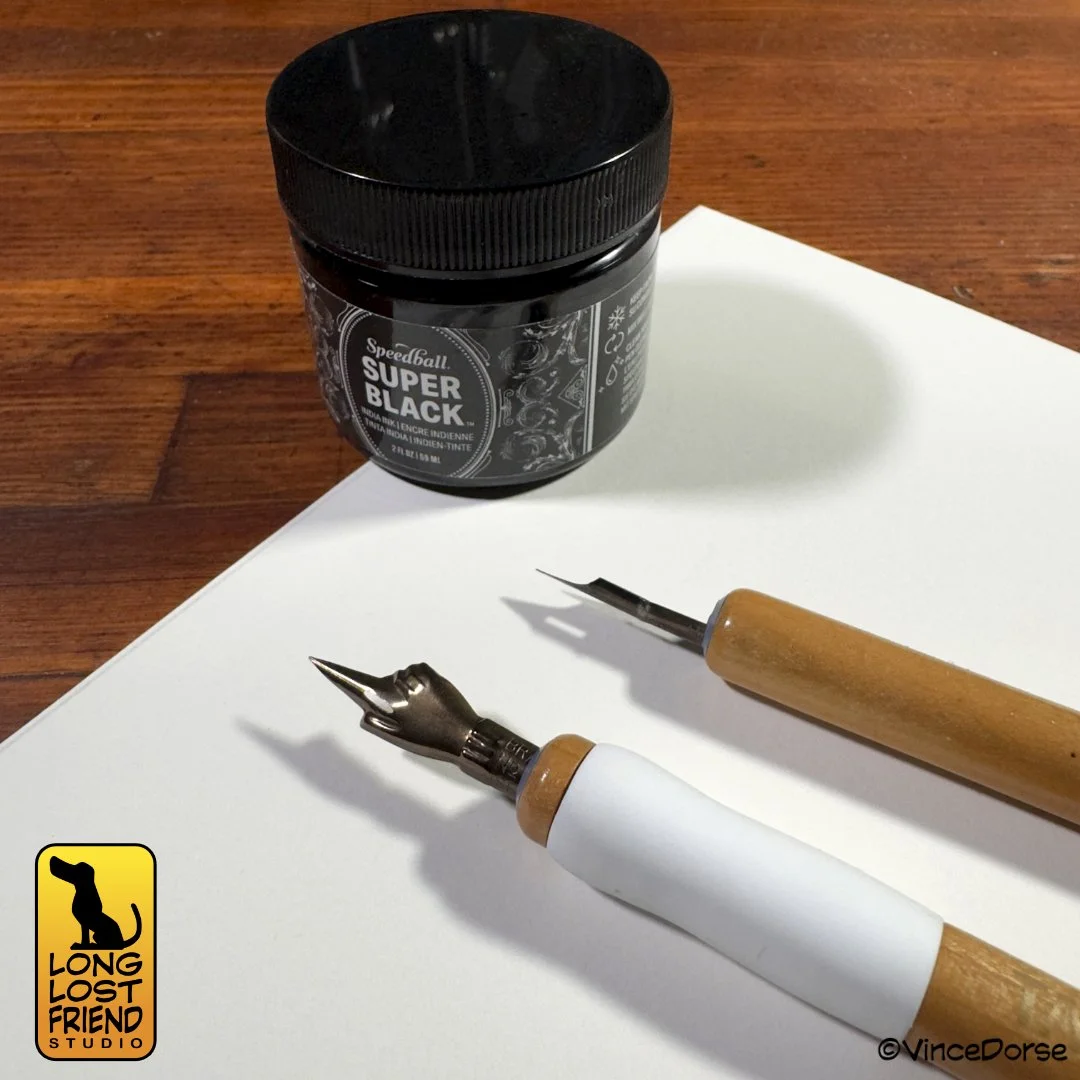
I was immediately proven wrong about the cost of entry. For about twenty-five bucks, most folks could pick up a nib holder, a few nibs, ink, and good, heavy paper. So, initial expenditure was reasonable. This was a good sign. My next step was to sketch up some drawings and ink them.

I’ve been working on my traditional inking for a couple years now. The trajectory was fine liners to brush pens to brushes. And that’s where I planned to stop. But I knew some of my favorite illustrators used dip pens — Bernie Wrightson, Frank Frazetta, Edward Gorey, Hergé. Sure, to someone accustomed to tossing a handful of fine liners in my travel case and being able to ink anywhere from a bus stop to a bookstore, using a nib and holder seemed as archaic as being bound to a monk’s scriptorium desk and using a giant, feathery quill pen. But Wrightson and those other legends turned out amazing work with a dip pen, so I figured they were onto something.

After sketching a few images, we set up the camera so as to catch the carnage. For a long time I’d envisioned puddles of ink spattering the paper, inky palms and fingertips, and long black trails smudged across my drawings. But somehow, while my mark-making was hesitant, I managed to make it through the first few drawings without any appreciable mess. So that’s another assumption I was wrong about. Oh-for-two so far.

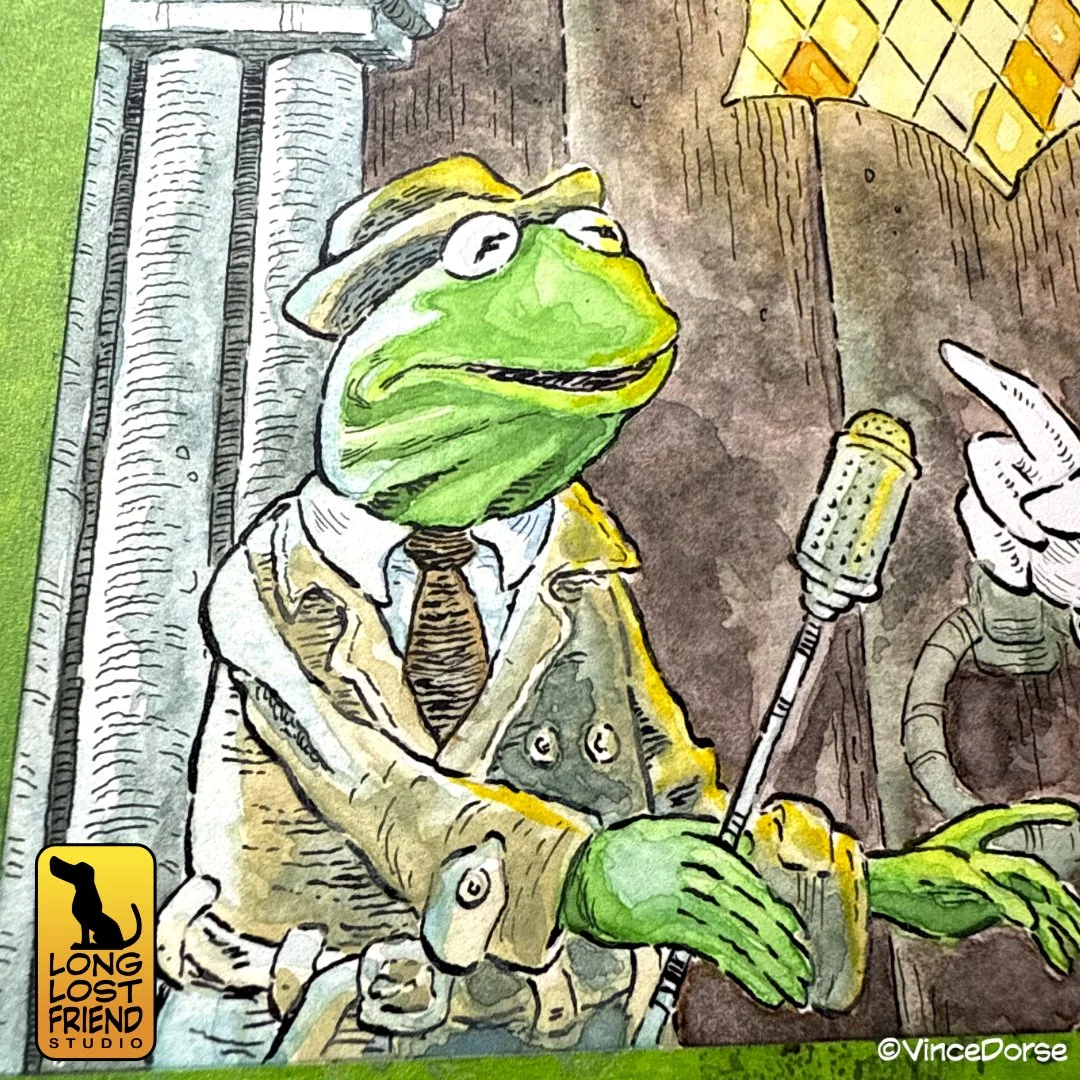
At this point, I reasoned the best way to determine my affinity for dip pen inking was to keep drawing. So I cranked out some old favorites: Sesame Street, Maurice Sendak, and some random monsters. I tried out different hatching techniques that were successful for other illustrators who use dip pen. And though working in styles that I’m not entirely familiar with isn’t always intuitive, I did end up learning more about the tools.

I finally understood the unique position dip pens hold in the range of inking tools. Depending on the nib you use, you can pull a very expressive variable weight line by adjusting how hard you bear down on the pen, much like you can with a brush. But because of the rigidity of that metal nib, you can also scratch out pretty consistent, razor sharp, fine lines for hatching in the same way a pen with a fixed-size point can. So the dip pen turns out to be amazingly versatile. And that’s something I want to explore more in the future, developing different line and hatching methods that work well with that tool.
Having disproven my assumptions about this process being expensive and messy, the only hurdle left to leap was whether or not it was ‘mildly annoying.’ I can’t say I didn’t enjoy working with the dip pen once I got the hang of it. And I’m definitely inspired to do more of this and improve my skills. So yeah, it was fun. And the fiddly parts of the process — the changing of the nibs, the constant wiping of the nib to prevent dry ink from caking on — are no more annoying than having to swirl a brush in a cup of water or remembering to re-cap your fine liner so it doesn’t dry out. And there’s an added sensory experience to dip pen as the sound of the nib scratching on the paper is unlike anything a brush or pen produces. It’s like a more pleasant version of fingernails on a chalkboard and it’s honestly kind of soothing. So there you go. Oh-for-three on my assumptions and I ended up with a new tool to make art with. I’m calling this experiment a success.

As I mentioned before, we recorded my process and, in the interest of passing on what we learned, we tossed in some tips and supply recommendations in the video description. It’s all available at the link below.